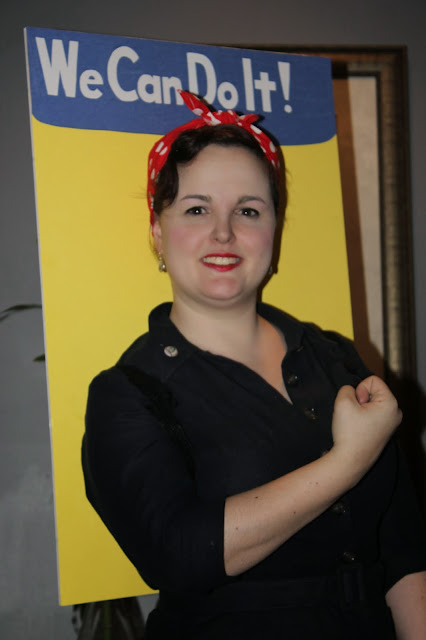
As some of you may recall from my previous post Halloween... What to be? I was debating what to be and was appalled by the options available to me. It seems everywhere I turned someone was encouraging me to be a sexy pirate or candy bar or some such nonsense. So I worked out a Rosie the Riveter costume. I based my pattern's inspiration on a sewing pattern from the 1940's and I think it came out awesome!
While it is a small portion I am proud of figuring out how to do the Rosie's collar pin. I didn't have a button maker so I used a covered button covered in the same jumpsuit fabric. I then printed the pin image and modge podged it on. Not for nothing but I thought myself particularly clever.
This pattern was the first time I drafted my own pants. Pants are a particularly difficult hurdle to jump, especially for girls like me with a bit of booty. But I made a muslin and fitted them up, and I was jazzed about them.
I ended up removing the pleats and doing them flat. but I think that for my first real go at a self drafted pants pattern solo they went pretty well. Hello nice booty!
I draped the bodice and did up a sleeve really quick. I had confidence they would fit so I went straight into the real fabric.
I topped it all off with a covered belt and I have to say that I was very proud! The belt was a little tricky as the fabric wanted to be shifty but it all worked out.
Last but least I needed the classic red polka dot head scarf. This was simple to make but not necessarily super simple to tie up. It is one of my favorite simple ways to wear my hair.
This was a really fun costume to make and I'm sure it will be worn again by me and my wife. When Deb saw me in my jumpsuit she checked me out and said, "You were definitely born in the wrong century." I have to say I think she's right.
Happy Halloween!


Very nice!
ReplyDeleteAwesome costume! And nice work on that pin/button. :) I especially like your covered belt -- I've been wanting to try that! Yours turned out great. Any tips?
ReplyDeleteThe covered belt was an accidental success. I didn't pay attention to what size belt kit I bought, I just winged it so really I'm just glad it fit my waist. what I did was just to cut a piece of the fabric 3x as wide as the belt and folded it behind in the back (I folded my raw edges under) and then I top stitched it down. In the future I may try to make like a tubed casing, but the only trouble with that is that it will have to be extremely precise. If it's too tight it won't go on and too loose it will look bunchy and odd. I will say that the kits come with this sticker that you stick on a scrap of fabric, its a pattern for the actual buckle. At least with mine the adhesive was extremely strong, so you want to be cautious sticking it to your fabric because its hard to get up if there's a ripple or a crease. Hope that helps!
DeleteThat totally helps, I'll save these notes for future reference!
DeleteGreat job! The head scarf is perfect.
ReplyDelete