Pages

Tuesday, April 28, 2015

Teacup Dress

There is something I have always wanted in my wardrobe, a teacup dress. I love to use imagery of my favorite things in my sewing. Usually it's a mix of sewing items and tattoos, but I definitely have needed teacups in my closet for a long time. I found this amazing fabric at Joann's in the red tag section and in addition to being on clearance it was an additional 50% off! Holy hot darn now is my time. I bought everything they had and I was not truly sure it was going to be enough, it was only 2 yards and 15 inches. On top of that the woman cutting wanted to even out the cut at the end of the bolt. I nearly hopped across the table to stop her. I needed every inch. 


I decided to use an altered version of my spring for cotton dress. The fit of that bodice was so fabulous that I knew I could change it a little and make something fabulous. Another thing that I have been hankering for is a contrast stand collar and button band. After making a new version of the bodice I set to work on the collar and button band.


I decided to do a small stand collar. I wanted to keep the actual collar quite narrow, I wanted it to be delicate. The fit on dress form was fabulous, it made me so excited to get it on my body!


The next big decision I had to make was buttons. I love buttons, but they are hard to choose between, too much awesomeness. I hemmed and hawed for a while and in the end I fell in love with the black buttons. I just love them, it's kind of mimicking a tux front too. It feels so classy.


I did a little spot check and pinned the bodice on myself in the mirror. I only became more excited after that. GET THIS DRESS ON MY BODY!


I popped on a few buttonholes, my machine Bernice, makes the most amazing buttonholes, and then the bodice was good to go.


Once I solved the bodice, the next hurdle was the skirt. I did a gathered skirt with inseam pockets. With very few exceptions I think that all dresses need pockets! I also put on these little white flanges in armscye for some extra detail in the sleeve.


Hopefully there will be a photoshoot soon, but long story short. I love this dress and can't wait to get more wears out of it.


Since losing all my weight I don't have as many me made items for May coming up. So I am working on increasing the things I can wear, and this little number will certainly be on the list!


Sunday, April 19, 2015

Spring for Cotton Photoshoot

I finished my Spring for Cotton dress and now here is the much lauded and talked about photoshoot results. My dear friend Mary, brought me to the undeveloped portion of the Gym building she goes too. It was an amazing place to shoot! Mary is incredibly talented. She makes everything look as good as it possibly can. I love these photos.
After this whole long journey, losing almost 30 lbs., new job, and rolling the derby, I'm just so happy. I like how I look and even more than that, I like how I feel. One bitter sweet thing is that now some of my measurements are smaller than my dress form. It's so sad, dress forms are expensive, but at the same time yay for me.


I love this shoot. Can't wait to do more! I'm working on a new dress with teacups on it. Perhaps in a tea shop or something. We'll see what the incredibly talented Mary thinks.

Monday, April 13, 2015

Spring for Cotton Dress is done!

I've finally finished it. There have been many moments of hemming and hawing and changing my mind but it's done and it's beautiful. I don't yet have any pictures of it on me and not just my dress form but I will have them soon.


One of the first things I vexed over was how to finish my armscyes. Turn and topstitch? Turn and hand stitch? As I pondered I came to the realization that I wanted to use single fold bias on the edge, press it to the inside, and then hand stitch it. I debated using hem tape and gave topstitching a shot but I wasn't doing either of those things other places so it just didn't flow the way I wanted it to.


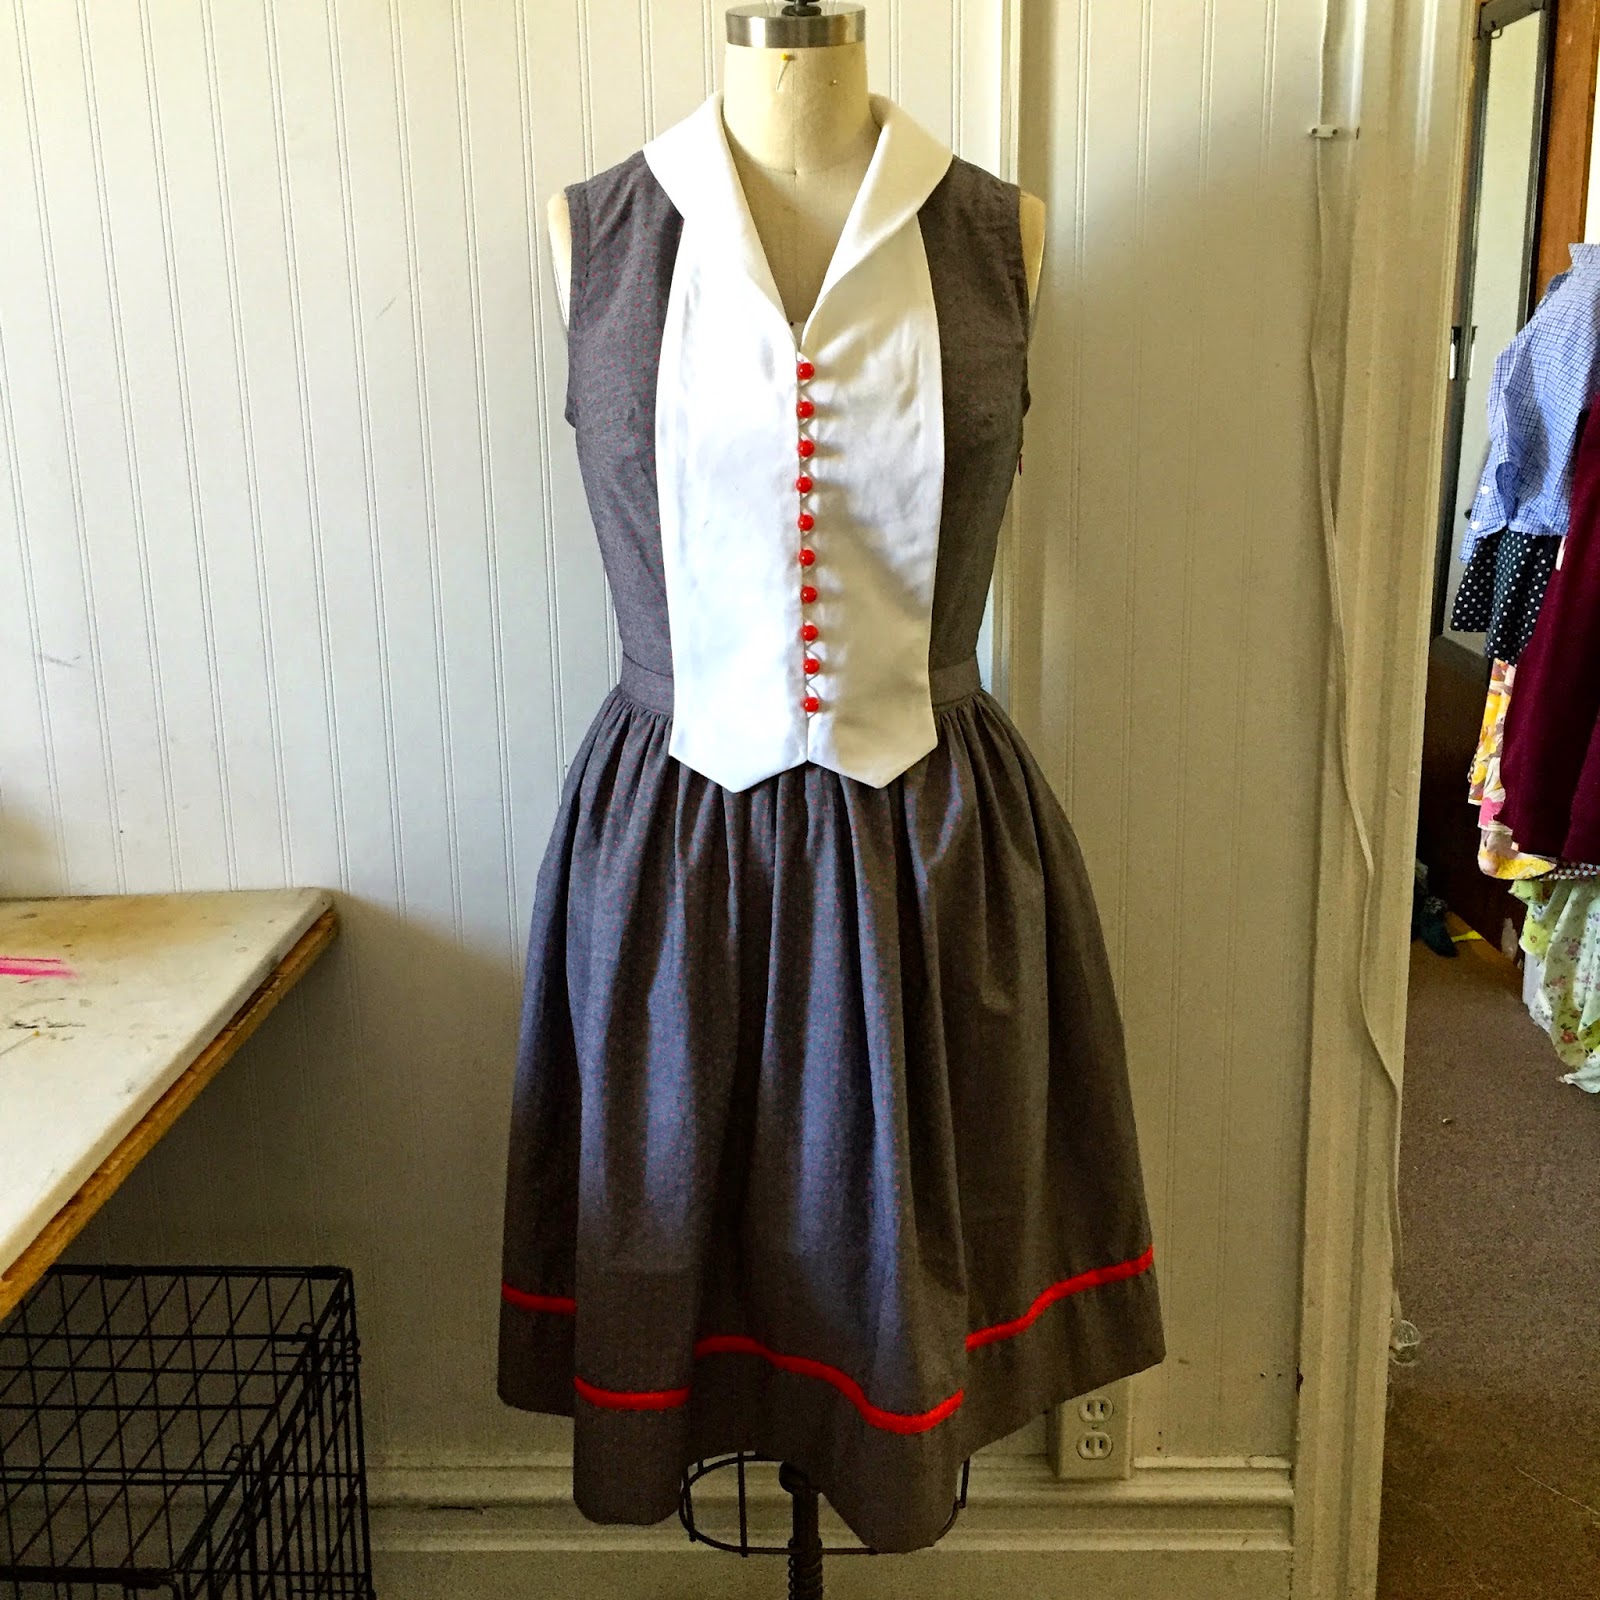
This dress grew on me the more I worked on it. I think one of the things that I loved most about it was that I didn't have all the answers. I played with things, looked at it on the dress form, and I let the solutions speak to me. One of the next issues was figuring out what I wanted the neckline to be when I didn't have the vest on. I initially thought these fold backs were the answer, but it just wasn't sitting right and when I had the vest on the fold backs sat beyond the edges of the vest. I ironed out the creases I made when putting the lapels in and then I put it back on the dress form to play with it.  


I really loved what it looked like without any fold backs in it at all. It's modern with retro styling. It was such a happy accident. It looks so cool!


It should not go unmentioned that Hobbes did not let my crafting get in the way of his need to sleep in the middle of the of the floor in my studio. He's got a commitment to excellence.


I used an invisible zipper on the side seam and for the first time in a long time it lined up perfectly on the first go. Goodness gracious what a score!


Look at that beautiful zipper! Heck yah!


Also just on a side note (Get it side note? We're looking at the side seam), I also added pockets to the skirt. All dresses should have pockets. It should be a prerequisite.


One thing that made my life incredibly easy was that because the skirt was just two gathered rectangles the hem was straight. So I just picked the depth of the hem, I chose 4" because I wanted it to be substantial, and then I took to my glorious machine, and blind hemmed it. 


It looked great but then The dress felt very plain and was almost veering into weird cat lady jumper territory. I began playing around with different hem lengths but when I made it shorter it didn't look balanced and I didn't want it to be longer. That was when I noticed the leftover red bias. I started playing with it and I really love it at the hem.


Now let's have a conversation about the vest. It was one of my favorite portions of the dress. In my last post I spoke about the vest issues I was having because I hadn't interfaced it on both sides. I entertained trying to take the first one apart and adding interfacing to it, but it was too much work. I decided to just recut and start over. It came out much better. I am really happy with the end result.


I love my dress! I'm not on the fence anymore. There will be more pictures forthcoming of me in the dress. I have plans with one of my favorite photographers on Wednesday. Till then!

Wednesday, April 8, 2015

Spring for Cotton is ON!

Okay, so now that I have waded into the water of my dress/vest situation, I have decided that I do in fact love it. I've been fascinated figuring out this puzzle and how to put it all together.

I have chosen my fabric. I am going with a 100% cotton Chambray from Gertie's new fabric line at Joann's, it has these brilliant red printed polka dots. They're amazing. And I'm pairing it with a solid white 100% cotton shirting.


After trying on my muslin I did adjust the fit a wee bit. I mean don't get me wrong it went on my body but it looked painted on my body. I loosened it up a little bit by just adding a 1/4" to the side seam of each pattern piece. It just needed the barest breath of space.


Aside from the fact that she needs a press I am happy with the result. She'll have buttons up the center front of the bodice, a side zipper, and a dirndl skirt. I like the little fold back almost shirtwaist feel of the bodice. On the back of the neck is a little mandarin collar that I am going to attach the vest to with a button the inside on the center back.


I laid the mock up for the vest over the bodice and I really liked it, so full steam ahead. My next step was to cut and assemble the vest.


Now here is the problem that I have. As I usually do with collars I only interfaced one side of the vest. I chose the part that would be facing out at the neck edge. Now the front lacks the crispness that I want it to have and you can see the ripples where the button loops sit in the seam allowance. It feels crazy but I think I am am going to remove all the buttons, open her back up, and re-interface the other side of the fabric. I just can't handle the ripples. Oh Dear.