Pages

Sunday, August 4, 2013

Tailor it, Personalize it Customize it: Down and Dirty Simple Hems.

I have decide to do a new series of mini posts in between my longer ones.  One gift sewing has brought to my life is that even when I buy an item of clothing commercially I have the ability to get the perfect fit, hem length or custom detail.  My goal in these posts is to show you simple things that you can do to achieve the same tailored success.

As is usually the case with my sewing projects I have decided that Deb (my wife) should have her alts done first.  This is how it usually works in our house.  Deb says, "It would be great to have a (insert item here), that does (insert function here)." Then what happens is the Elves (they would actually be me) make it happen.

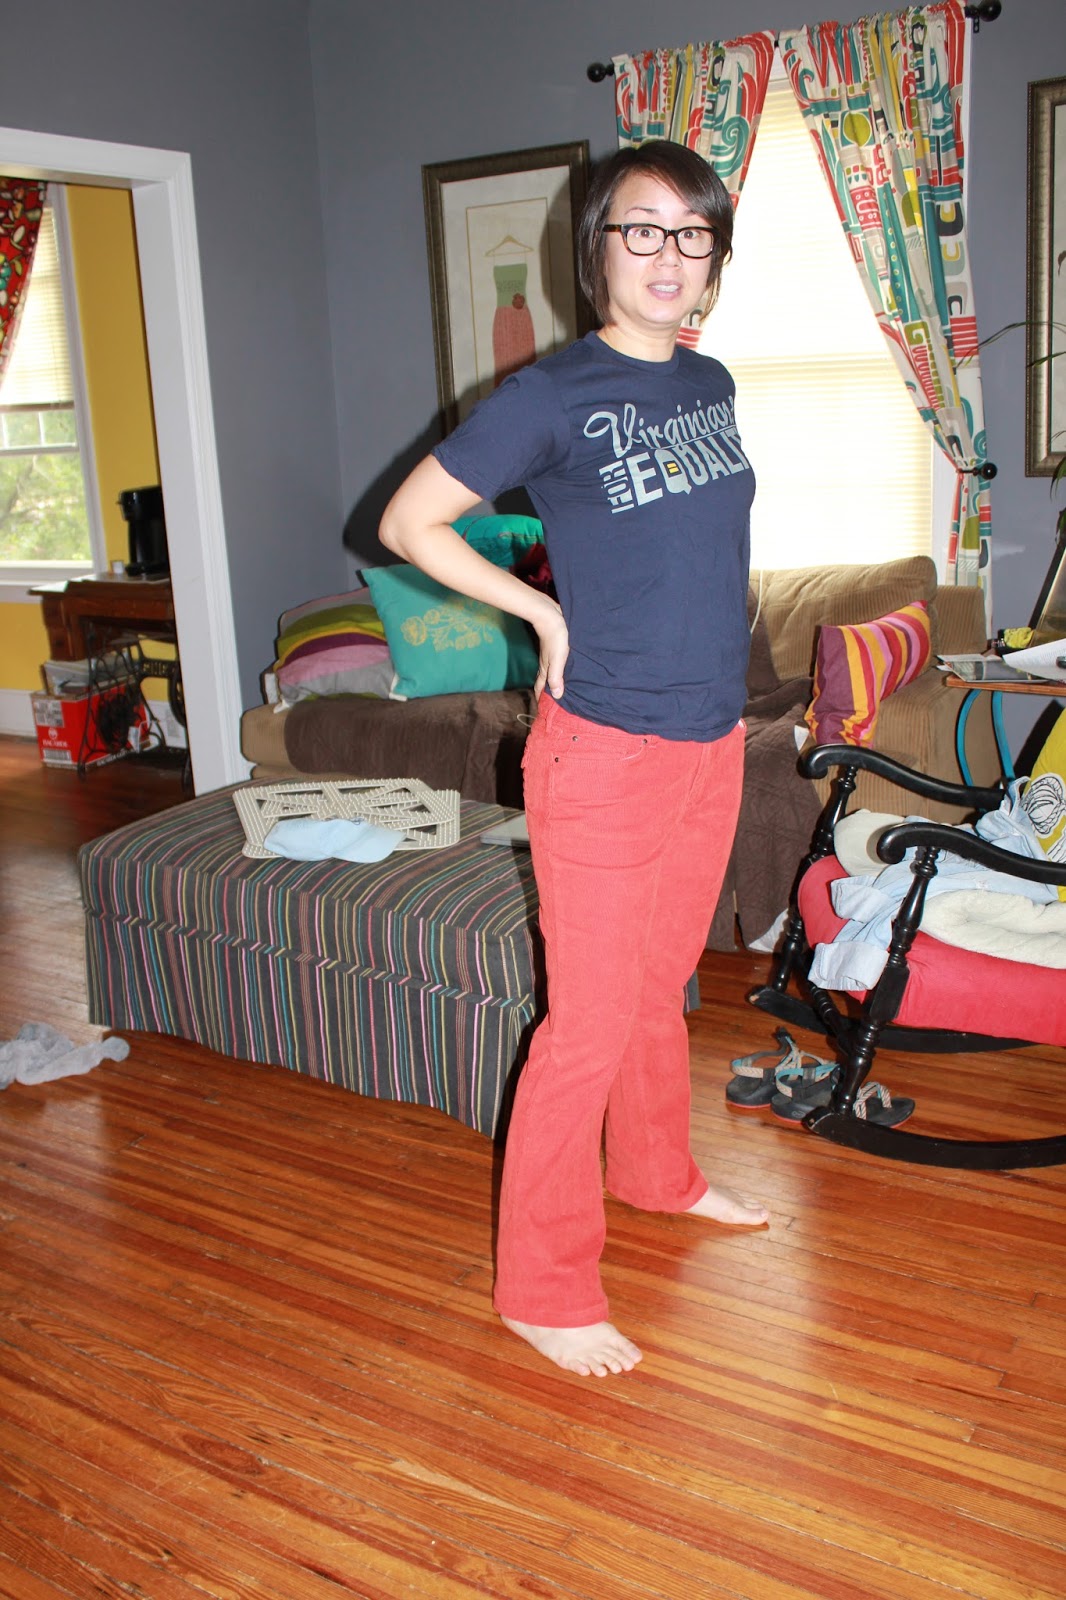
The first project I am going to be getting into is shortening two pairs of Deb's pants.  She was very insistent that I tell you that she got these pants for $7 on sale at Eddie Bauer! In her words, "These are not $7 pants! But I got them for $7."  That's my baby, always psyched to get a deal.

Step 1:
Try on your pants and have a friend help you pin up the extra length.  To get a good fit it is important to be looking straight ahead with your hands at your side.  Have your buddy roll up the cuff until you get the desired hem length on the pant.  Pin it in place on the front and the back and then take off the pants.

If you have one leg longer than the other repeat this step on both legs.  Otherwise you can measure and match the amount you're going to shorten the pants based on the first leg.

If you are shortening the pants solo then what I would suggest is cuffing the pants to where you think the hem should be.  Then assess the hem in a full length mirror to be sure you are happy with the new hem.  Pin it in place before you remove your pants so you don't lose that measurement.


Step 2:
Taking your marking tool, I like a tailors crayon, and mark the folded edge of the cuff you have pinned in.  Make sure you mark on the front and the back and mark on the wrong side of the fabric.


You can then unpin the cuff that you have made.  Turn the pants inside out so that you can see your marks.  Measure the distance from the current hem to your marks on the front and the back.  These two distances should be close.  If they are different I always like to use the shorter measured distance.  This way I cut off less of the pant.  You can always go shorter, but once you cut it off there is no going back.

Step 3:
On these pants in particular I am doing a 1" roll hem.  That means that the total amount of fabric in the whole hem is 2 inches.  The distance from the current hem to where I want it to sit is 3.5".  That means I needed to cut off 1.5" total.  I marked a line 1.5" up from the original hem


Step 4:
Cut off you're extra fabric on the line that you marked.


Step 5:
I marked two inches up from my cut line.  This give me a line to fold to.


Step 6:
Fold the raw edge up to the line and press.


Step 7:
Once you have folded and pressed the hem up to the line that you marked (up 1"), you are going to fold the fabric up one more time. Now press and pin.


Step 8:
Next step is to sew.  Put that bad boy through the machine!

FINAL STEP:
Get your wife to throw those pants on and show off your handy work.


When at all possible get a Great Dane in on the action.  If you have one named Orson all the better.


That's a good looking wife, I mean hem, I mean Great Dane....AHHH I mean you're all pretty!

Saturday, August 3, 2013

My Wife is awesome and now I have a new project

My wife is an amazing woman!  Last night I came home from work and she surprised me with a new tablet.  I was like "WOH!".  I have been coveting the Samsung Galaxy Note 10.1 for a long time.  It has a stylus which allows me to draw easily and I can use it for planning out patterns and dimensions.

Well of course when you have a new piece of technology you want to make sure it is protected, and if you are anything like me, you want it stylishly protected. That means it's time for a tablet case. First order of business was to take measurements and plan out the size of my case and its pattern pieces. I planned them all out on my new tablet! Very exciting.  My tablet is 10.5" x 7.25" x .5" and that is how I got the basic measurements

***Please note the the dimensions listed below do not have seam allowance added to them and thusly you will need to add the amount of seam allowance you are comfortable sewing with.  I have added a half an inch to each side.***


Based on these dimensions here is what you would need to complete this project:
  • 1/2 yard of upholstery weight fabric or vinyl for the exterior
  • 1/2 yard of quilter's weight cotton or lining for the interior
  • 1/2 yard of batting
  • 1/8 yard of vinyl for the straps or 45" of strapping
  • A ruler (I prefer clear quilting rulers)
  • A pen or pencil to mark with
  • Scissors (I know obvious but there you go)
  • 2 sets of Line 24 snaps (thats what Tandy calls them) or Heavy Duty Mighty Snaps (stupid name, but that's what Dritz calls them.  Stupid)
  • Matching thread

Using this stripe fabric made it easy to measure and center the portion of the stripe I wanted.  I really like this multi-color color stripe.


I then drew and cut out this sugar skull shape from black vinyl.  I did some decorative topstitching on it before zig zagging it centered on back pattern piece

*One thing to be careful of if you are going to add an applique on the back of your case is that it doesn't extend into the portion that will be your flap. Also if you are planning to add straps you want the to make sure your applique isn't wider than the distance between the two straps.  After taking my measurements I knew that my applique had to be smaller than 7.5" tall by 6.5" wide.  


After I had my sugar skull decorated to my taste I zig zagged it onto my fabric.  


The pieces on top is the back of the case and the smaller rectangle on the bottom is the front.  The reason the back is larger is because it has the 3" of the flap at the top.


With right sides together you are going to seam the back and front pieces together at the bottom edge and press your seams open.


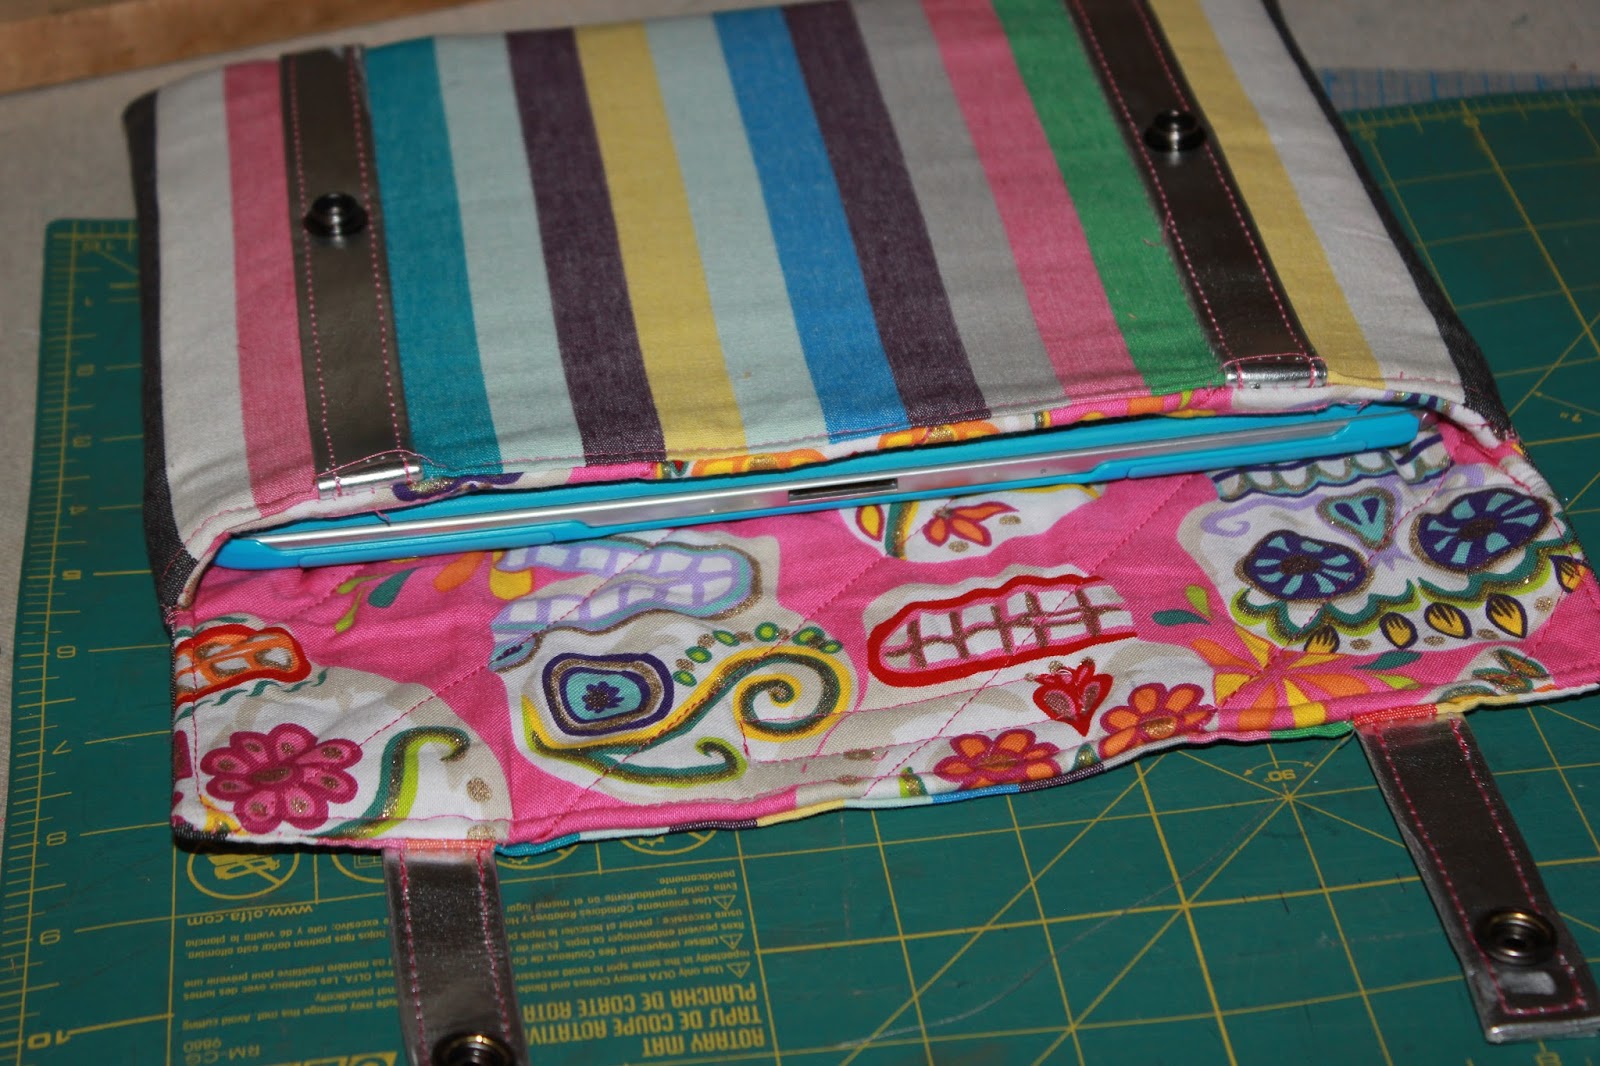
After you've seamed these together and pressed your seams you can apply your straps and batting.  I chose to use some silver belting I had left over for my straps.  What was really convenient about the striped fabric is that it makes it really easy to line up the straps and keep them parallel.


I had some quilted batting left over from another project so that is what I'm using as an inner lining for my tablet case.


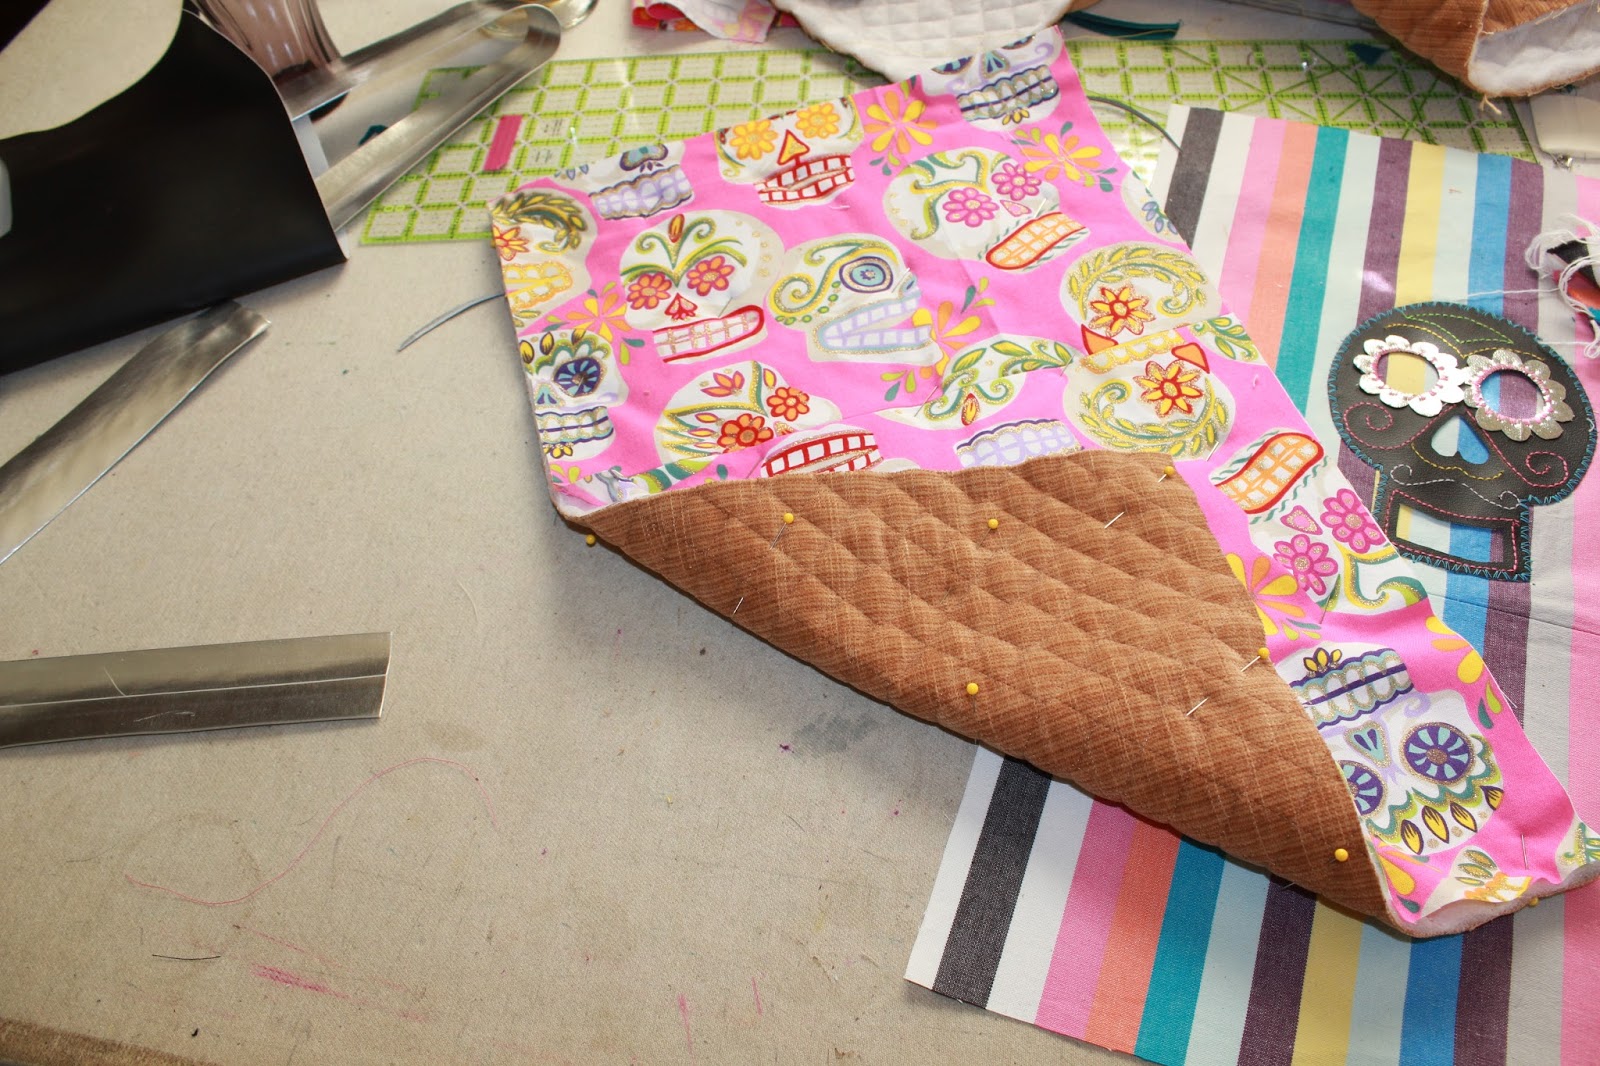
When I add batting as an inner lining I like to quilt the batting to the lining fabric.  This helps to unify the pieces and keeps the inner lining from shifting.


Pin at multiple points along the fabric on the side you plan to have face up when you sew.  I would suggest marking the line you plan to stitch on or if you are using fabric which is already quilted you can stitch on that quilt line.  That is what I did with mine.


It's a little time intensive but it's worth it. I think it really helps the end product to be clean and precise. Plus it's cute!


Now for the straps.  If you are using pre made strapping or a strip of vinyl or leather all you need to do is pin it where you want it and top stitch it in place.

*When you are topstitching your straps down don't stitch into your seam allowance on the flap edge.  You need this to be free so that you can turn that top edge later.


With my belting I had to baste it down before topstitching because I needed to fold my belting in half before topstitching. By pre stitching this open it will make things easier to stitch when it's folded.


I also folded in the open edge of my belting so that the edge wasn't raw. I did this to clean up the look of the strap.

I totally forgot to photograph the next step in a fit of exhaustion.  I have diagramed the next step here. You should start with the exterior fabric and stitch it at 1/2" seam allowance (or whatever seam allowance you've decided on).  Next stitch the lining together in the same way but stitch the lining at 5/8" seam allowance.  Stitching the SA (seam allowance) slightly larger on the lining it makes it easier to fit the two pieces together later.


So I hope that was clear. I felt like a dufus! Bad Caroline! Once you've made those seams in the next step is to stitch the two pieces together and bag them out.  Each piece should look like a little pouch. What you need to do is turn the lining with the right sides facing out, which means your seams will be inside of the pouch.  Place the lining inside of the exterior pouch and line up the seams and pin them together at the seams.  Clip into the seam allowance almost to the stitch line, at the point where you back stitched 1/2" from the top of the front piece.  This will make it easier to manipulate the fabric when you put it through the machine.


Starting from 2" off of the center of the flap stitch along the outside edge, make sure that you don't catch your straps in this seam, you want to fold them to the inside. Stop stitching 2" off center on the opposite side, this will leave a 4" opening at the center of the flap.  This will allow you to turn the bag right side out and allow you to have beautiful clean finished edges.


Once you've stitched around the outside edge turn the bag right side out pushing the lining inside of the exterior fabric.


Now you have to turn the seam allowance of your opening to the inside and you can either hand stitch the opening closed or top stitch it closed.  I top stitched around the top edge of mine.


All that you need to do now is place and rivet your snaps on.  I used my clear ruler to mark where the snap needed to go.  Then I took my awl and put a hole through all the layers so that I could put my snap through.  Then I hammered my snaps together.


As you can see I also added my own little label to the flap.  I'm not selling it, but I just love how this looks.  I think it adds a polish to the whole thing.

And we're done!!! HOORAY!!!


Let me know if you need any help with any of the steps.  I'm happy to show you anything else you need!

-Caroline

Friday, August 2, 2013

Yeah I did the embroidery by hand, because I don't like machine embroidery (period)!

***Disclaimer: My above stated aversion to machine embroidery was a bit aggressive, I was feeling a little heated and for that I apologize.***

As I said in a previous post I am working on a new a-line skirt for the competition on SewMamaSew. I told a woman at a fabric store that I was embroidering the hem and then I showed her.  I pulled out what I was working on and she exclaimed, "Oh you're embroidering by hand! Well thats not very practical, what could you sell it for?"

Ok I'm sorry, sometimes its not about what I could "sell it for" because I'm not making it to sell.  I making it for myself to enrich my wardrobe and display my creative side.  Maybe that's something that happens when you own a business, even one creatively based, you stop seeing art and start seeing dollar signs.  I don't usually like to knock the way another cat swings, but I am really tired of having my passion quantified for the dollar value.

One more rant/tangent.  I do not really like machine embroidery.  I think that it looks grannyish and very unhip. I know this is coming from a girl who thinks sewing is a rip roaring good night, but still, I hate it. I think that it looks flat and well machine made, I know obviously, but I think it lacks the artistry of hand embroidery.  I know that I am ranting but I was honestly a little but offended.

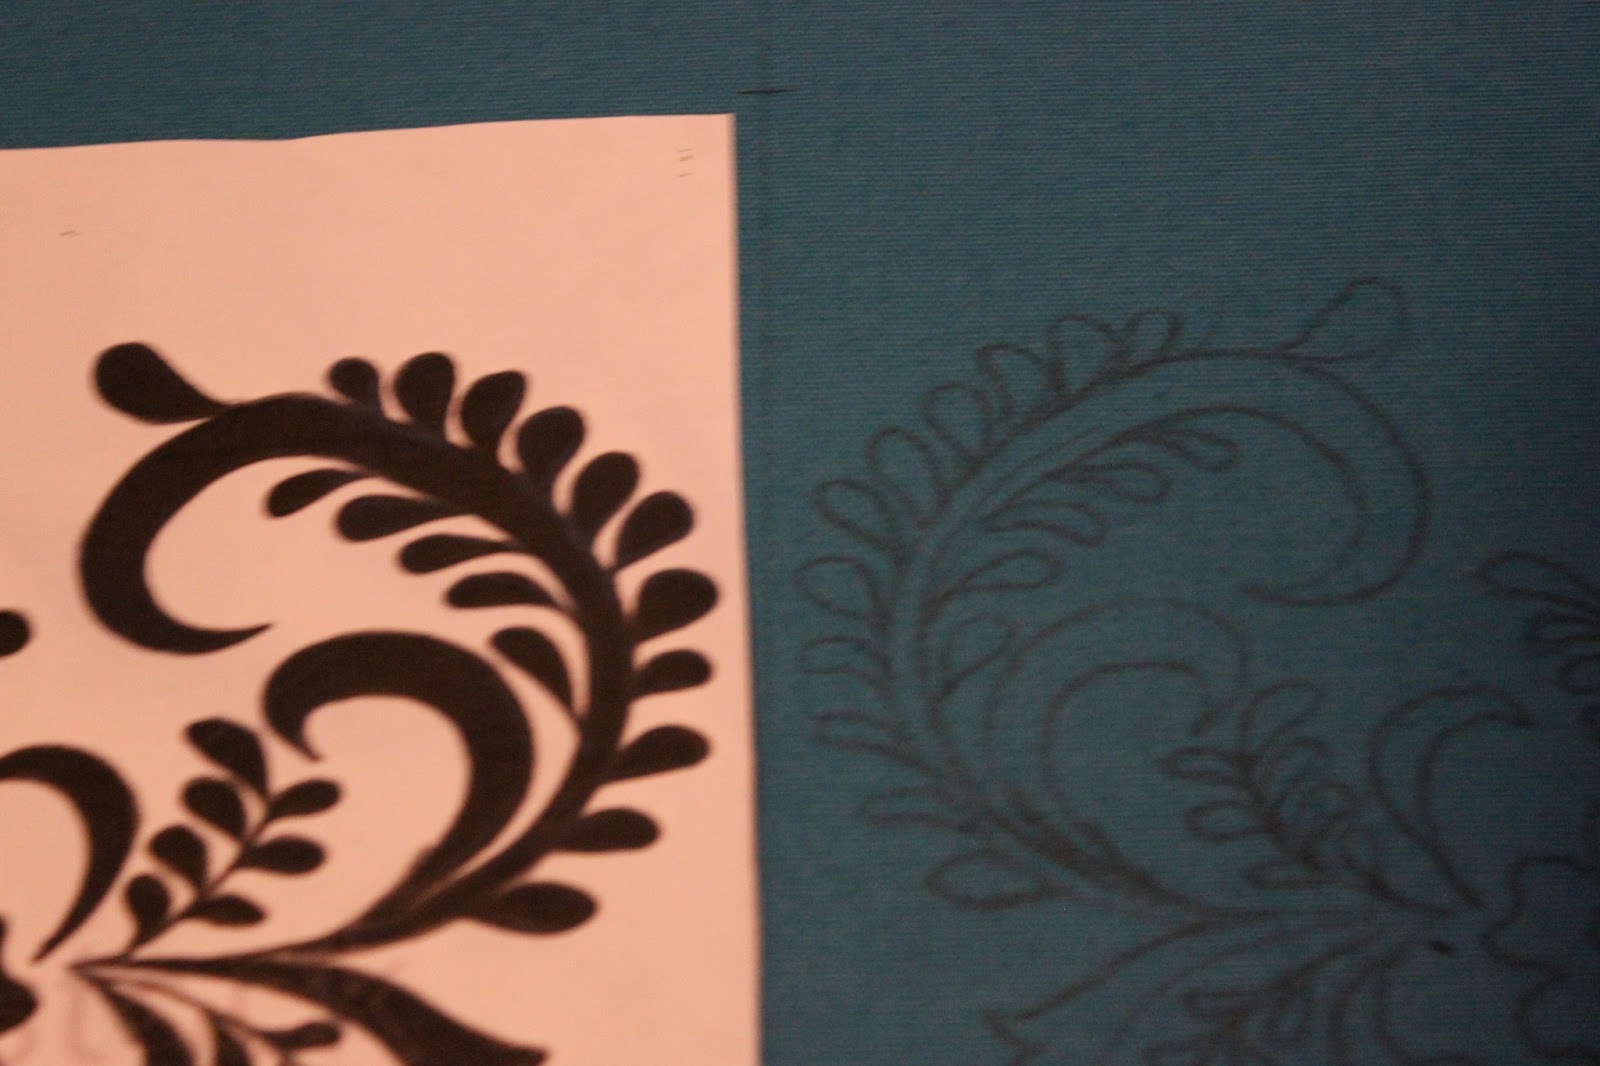
Ok, I'm cool now, I'll tell you how I'm doing it.  I started with a floral silhouette and used graphite to transfer it to my fabric.  There are transfer papers you can use to transfer your images to your fabric but, I didn't have any so I had to be creative/ I was too lazy to drive out to get some.  I took a pencil, I used a 9H because I find that the softer pencil makes it easier to shade the whole back of the image.


I drew out the outline of my pattern piece onto my fabric, but I didn't cut it out on the line yet,  I am going to wait till it's all embroidered and pretty.  Turning the image with the right side facing up I placed it there I wanted it just off center front.  I then took the same 9H pencil and traced the image which transferred the image to the fabric.


I used the corner and side edge of the paper and lined them up with a line I drew down center front of the pattern piece and a cross hatch to match where the corner should hit.  I made these marks because I wanted to transfer my design to both sides of center front and I want it to be symmetrical.  I did have to go back in after my transfer and redraw some of my lines that transferred too faintly.


In order to transfer the mirror image I flipped over the paper with the right side now facing down.  I matched the center line and the hatch mark with the proper corner and edge of the page.  Though I can't see the face of the image the lines I traced the first time are raised on the back of the paper.  I then retraced those lines and because I used a pencil on the front side by retracing those lines I transferred a mirrored version of the image.


Voila symmetrical mirror image pattern transfer.

Now for the embroidery itself. If you are looking for some really great stitch tutorials, I suggest Sublime Stitching's tutorials.  *Side note: They also sell some really great embroidery patterns.  They do paper patterns as well as PDFs*


I wanted my embroidery to use lots of different stitches and techniques so I taught myself a few different ones.  I also liked the effect of combining different colors of floss to create more dimensionality.


Here is a close up of one of my process shots.


My pattern was a little bit bigger than my hoop so I had to move it to complete my whole piece.  So here is the first half:


Now I just have to repeat this pattern on the opposite side to complete my skirt.  Once I get that done I'll post my finished skirt.  Stay tuned!


Thursday, August 1, 2013

I MADE IT!!! (puns intended)

I am sew proud to announce that I have been selected to be in the next voting round for my version of Colette Pattern's Hawthorn.


Needless to say I am very excited about being selected.  Plus I love my new dress.  Please vote for me! Here is the link to Colette's blogpost:

http://www.coletterie.com/your-creations/hawthron-parade-part-deux-vote-for-your-favorites

The link to vote is on the bottom of the page.  Please vote for me!  I am so jazzed.  My username is SewSewcial, plus you'll see my dress listed with my name!  Thanks everyone!